

Leora J. Goodin
I'm a blogger dedicated to sharing insights on lifestyle and wellness. Through personal stories and practical tips, I aim to inspire and empower my readers to lead healthier, more fulfilling lives.
Black Friday and Cyber Monday 2023 Deals for Motion Designers, grab it now!
Students and teachers save a massive 71% on Creative Cloud All Apps
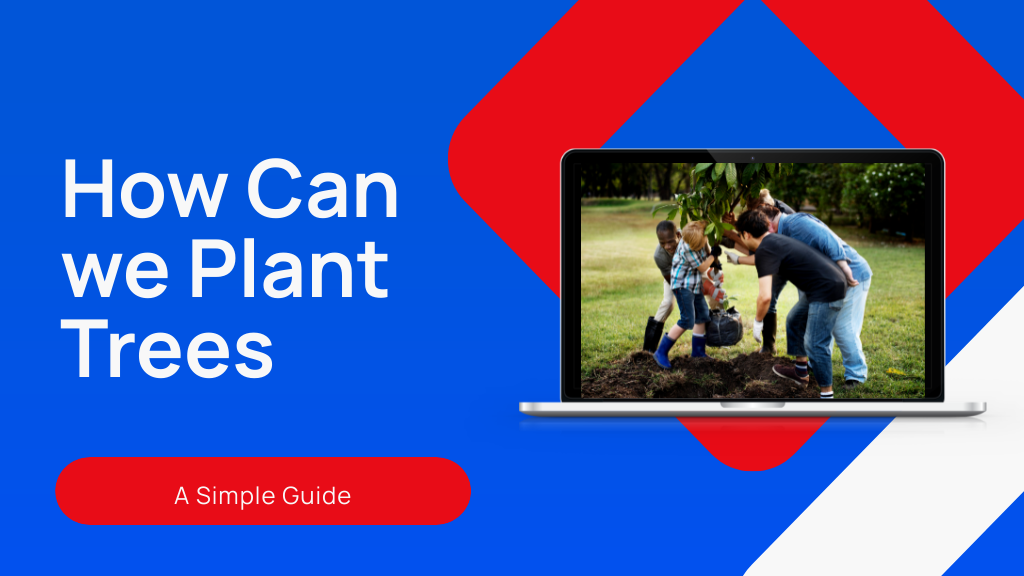
Starting with species selection and soil prep, discover the 10 essential steps we follow to plant trees successfully and ensure lasting growth.

To plant trees successfully, start by choosing a species suited to your environment and the right planting time, usually fall or early spring. Pick a good site, prepare well-drained native soil, and dig a hole wider than the root ball. Inspect and loosen roots, position the tree upright, backfill with native soil to avoid air pockets, and water deeply. Add mulch around the base, prune minimally, and monitor regularly for health. Follow these basics, and you’ll see your tree thrive with careful ongoing care.
When choosing the right tree for your space, you’ll want to pick a species suited to your local environment to guarantee it thrives. Consider the available vertical and horizontal space to prevent overcrowding as the tree grows. Knowing how can we plant trees effectively starts with selecting species adapted to your region; using resources like the Canopy Tree Library can help.
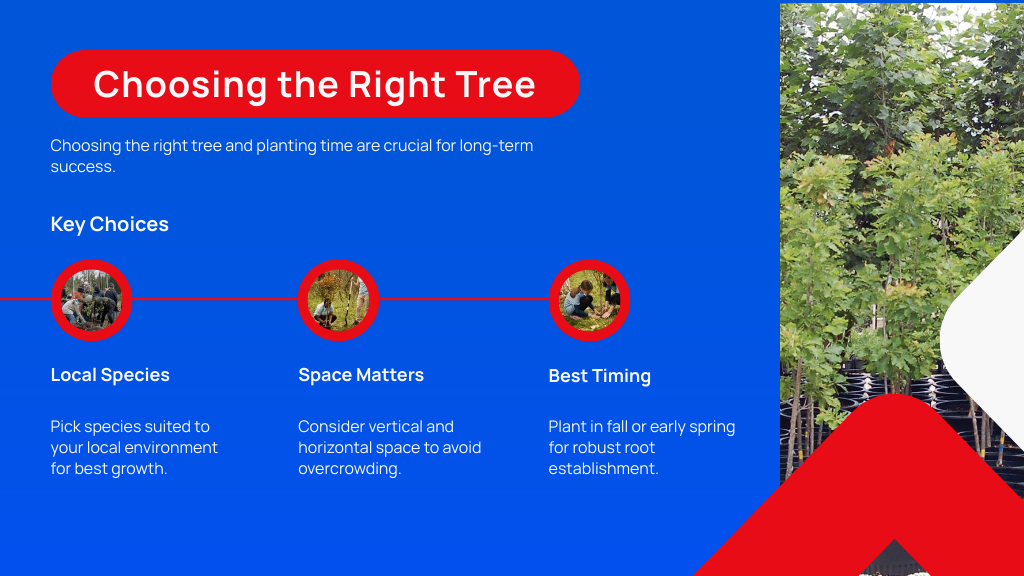
The best time to plant a tree is typically in the fall, allowing roots to establish before summer heat arrives. Early spring also works well, especially for container-grown trees, promoting robust growth throughout the season.
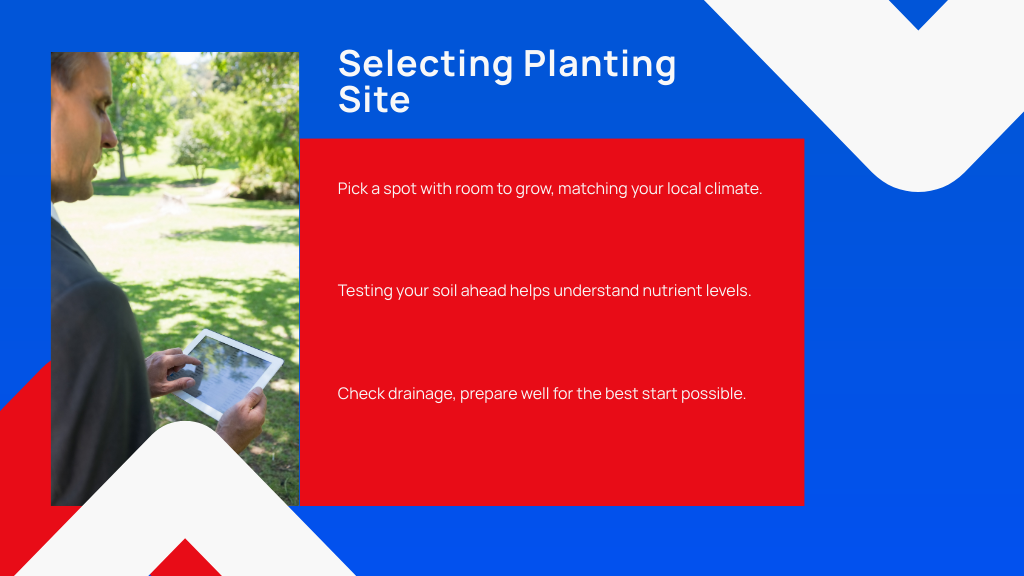
You’ll want to pick a spot that gives your tree enough room to grow and suits your local climate. Testing your soil ahead of time helps you understand its nutrient levels and pH, so you can make any necessary adjustments. Also, check for drainage issues and prepare the soil properly to give your tree the best start.
A successful tree planting starts with carefully selecting a site that offers enough vertical and horizontal space for growth, along with proper sunlight and drainage.
Begin by clearing the area of debris and obstacles, then till the soil to reduce compaction. Test drainage by filling the planting hole with water; if it drains slowly, consider raised beds to prevent root waterlogging.
When preparing the soil, incorporate organic matter to improve nutrient content and moisture retention, aiming for 10 to 20 percent of the soil volume.
Dig a hole two to three times wider than the root ball but no deeper than its height, ensuring the root flare sits at or slightly above ground level. These steps set your tree up for healthy development.
Since soil conditions directly impact tree health, conducting soil tests several weeks before planting is essential to identify nutrient deficiencies and pH imbalances.
Testing lets you know exactly what your soil needs, preventing guesswork that could harm your trees. Most ornamental plants prefer a pH between 5.8 and 6.5, so adjusting without testing might cause nutrient problems.
When preparing your planting site, keep these tips in mind:
Though selecting the right planting site may seem straightforward, ensuring good drainage is essential to your tree's health. If your soil drains poorly, consider raised beds to keep roots from sitting in water.
Test your soil several weeks before planting to check nutrient levels and pH, aiming for a pH between 5.8 and 6.5, ideal for most ornamentals. When preparing the planting hole, remove debris and loosen compacted soil, making it two to three times wider than the root ball to encourage root growth.
Mix in organic amendments like compost, but keep them at 10 to 20 percent of total soil volume. Avoid backfilling solely with amended soil; use native soil to help roots establish well in the surrounding ground.
You’ll want to dig a planting hole two to three times wider than the root ball to give the roots plenty of room to grow. The hole’s depth should match the root ball’s height, keeping the trunk flare at or just above soil level to avoid water pooling.
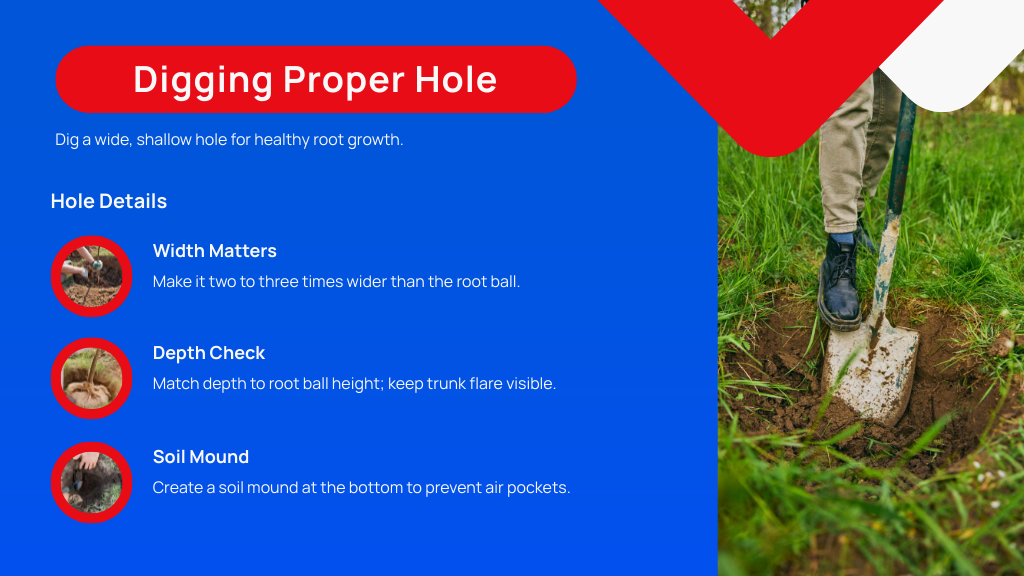
Plant the hole as deep as the root ball, ensuring the trunk flare stays just above soil to prevent water buildup.
Before placing the tree, create a soil mound at the bottom to lift the root ball and prevent air pockets.
Keep these tips in mind:
This careful preparation sets your tree up for healthy growth.
Now that you've dug the hole, it’s time to inspect the root ball closely. Check for any circular roots and gently break or cut them to encourage healthy growth. Make sure the root flare is properly positioned so the tree can establish itself well in its new home.
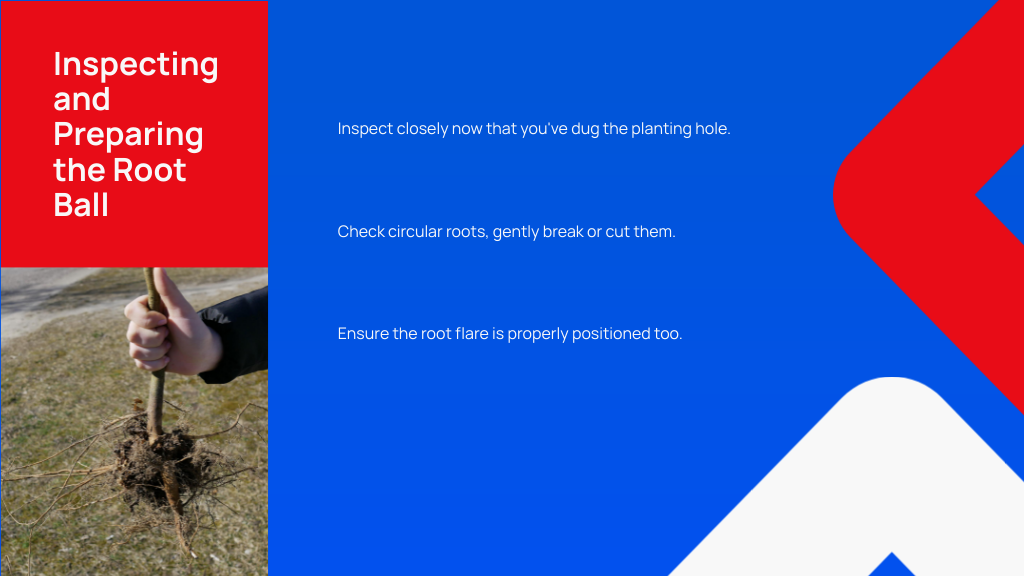
Before planting, take time to carefully inspect the root ball to guarantee your tree will thrive. A thorough inspection helps you avoid issues that might stunt growth or harm the tree later on.
Focus on these key tasks:
Though it might seem delicate, breaking circular roots is essential to help your tree establish strong, healthy growth. Start by inspecting the root ball carefully for any roots growing in circles. These can restrict your tree’s development if left unchecked. Gently massage and loosen the root ball to encourage roots to spread outward.
If you spot circling roots, cut them off to prevent girdling, which can stunt growth or even kill the tree. Remove any burlap, wire, or other materials wrapped around the root ball to avoid obstruction.
Finally, tease the roots apart slightly to promote robust root performance, making it easier for your tree to settle into the surrounding soil and thrive. This simple step sets a strong foundation for healthy growth.
When you're ready to plant, make certain the root flare—the spot where the trunk meets the roots—is visible at or just above the soil surface. This positioning guarantees your tree gets proper moisture and oxygen, which are essential for healthy growth. Before planting, carefully inspect and prepare the root ball.
Here’s what you should do:
One key step to planting a tree successfully is positioning it correctly in the hole. Make certain the hole’s depth matches the root ball’s height so the root flare sits at or slightly above the surrounding soil. This prevents water pooling and root rot.
Place the tree in the hole’s center, keeping it upright. Check from multiple angles to confirm proper orientation. Surround the root ball with native soil, gently tamping to remove air pockets, but avoid stepping on the root ball itself to prevent root damage.
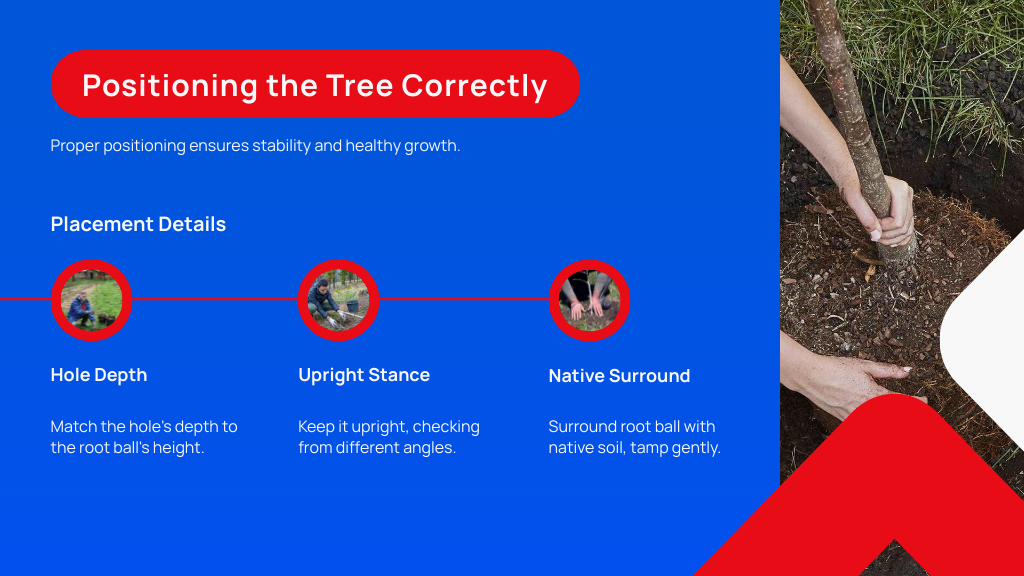
Also, maintain a slight mound around the base to keep moisture concentrated near the roots. Correct positioning guarantees stability and promotes healthy growth right from the start, setting your tree up for long-term success.
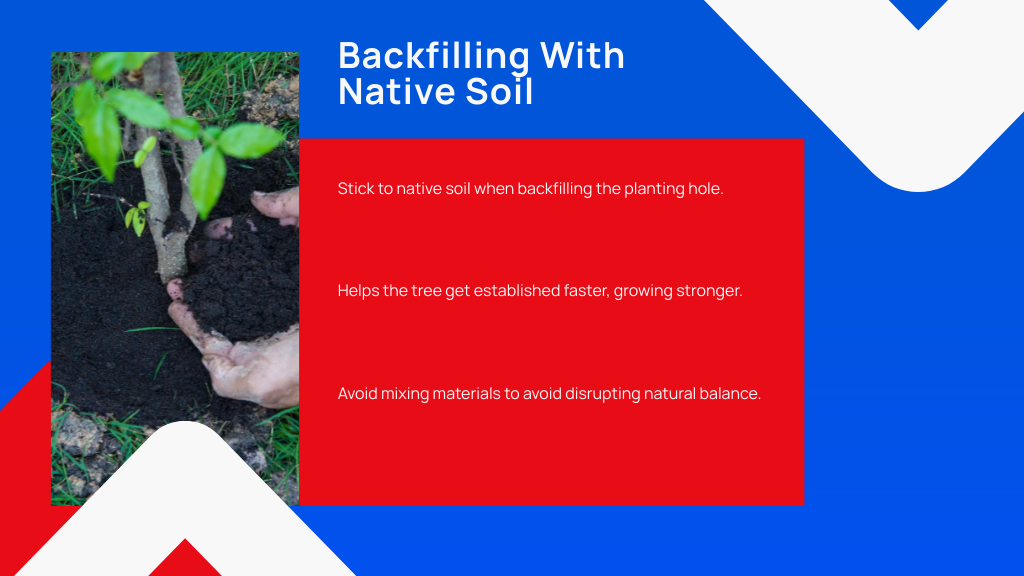
When you backfill the planting hole, stick to using native soil instead of adding amendments. This helps your tree get established faster and grow stronger. Avoid mixing in other materials that can disrupt the natural balance around the roots.
Using native soil for backfilling is essential to help your tree establish strong roots that spread naturally into the surrounding ground. When you use the existing soil, you maintain the right texture and drainage, which supports healthy root growth.
Here’s why you should stick to native soil:
Remember to lightly tamp the soil around the roots to remove air pockets without compacting it too much. This guarantees good soil-to-root contact for ideal tree health.
Although it might seem helpful to add compost or other organic material to the planting hole, you should avoid amending the backfill soil.
Studies show trees establish quicker when you use the native soil you removed during digging rather than mixing in amendments. Adding organic material only in the hole can trap roots, preventing them from exploring the surrounding native soil essential for long-term growth and stability.
Instead, backfill with native soil and lightly tamp it around the roots to guarantee good soil-to-root contact without compacting the soil. This “tough love” approach encourages your tree to adapt, strengthens its resilience, and promotes healthier root development, setting your tree up for success in its natural environment.
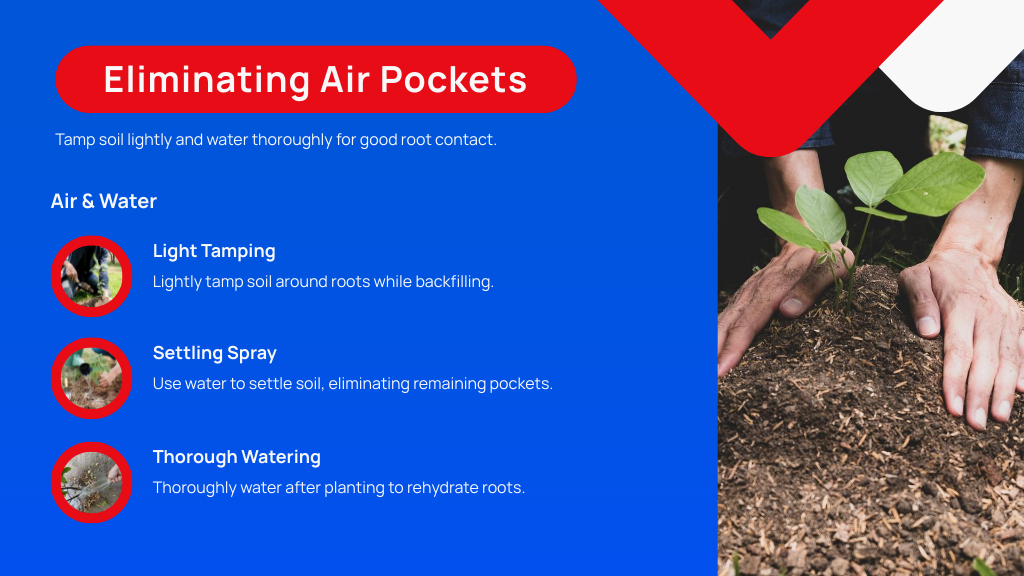
Since air pockets can suffocate roots and hinder growth, you’ll want to lightly tamp the soil around the roots as you backfill. This guarantees good soil-to-root contact and helps the tree establish itself.
Next, use a stiff spray of water to settle the soil, eliminating remaining pockets. Finally, thoroughly water the tree once planting is complete to rehydrate roots and secure the soil.
To effectively eliminate air pockets and water your tree:
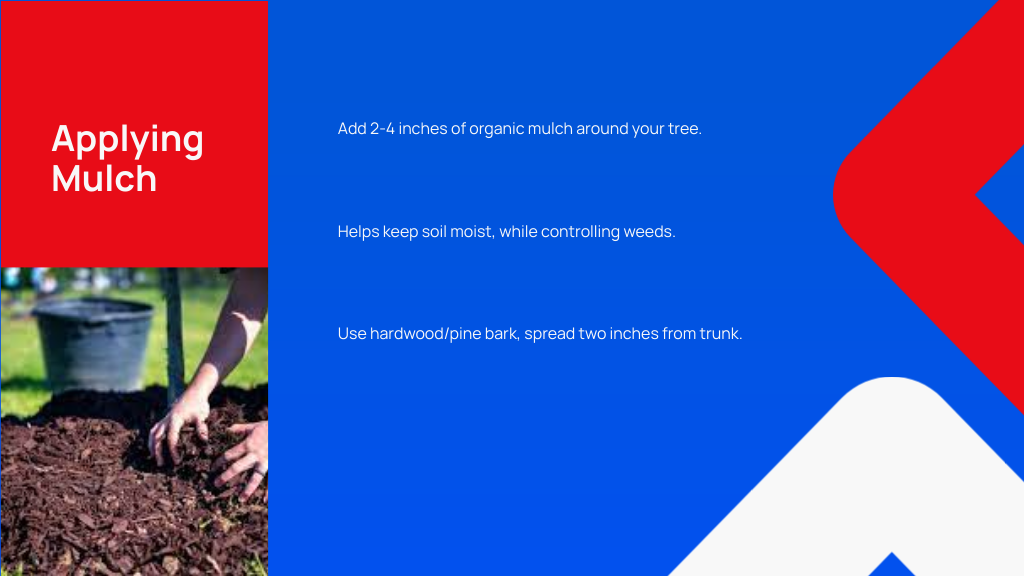
When you finish planting, adding a 2-4 inch layer of organic mulch around your tree helps keep soil moist and controls weeds. Use shredded hardwood or pine bark, spreading it from about two inches away from the trunk out to the tree’s drip line or beyond. This spacing prevents moisture buildup at the base that can cause rot or disease.
Mulch not only conserves moisture and keeps soil temperature steady but also suppresses competing weeds. As organic mulch breaks down, it enriches the soil with nutrients, promoting healthier growth.
Remember to replenish the mulch regularly to maintain its effectiveness. Avoid piling mulch directly against the trunk or root flare, ensuring your tree gets the best protection and support for thriving.
After you've mulched to protect and nourish your tree, it's time to focus on pruning for healthy growth. When transplanting, keep pruning minimal—remove only injured, diseased, or dead branches to help your tree recover without stress.
Avoid heavy pruning to compensate for root loss, especially with Balled and Burlapped plants, as this can slow establishment. Structural pruning should wait one to two years after planting to encourage natural shape and strong growth.
Keep these tips in mind:
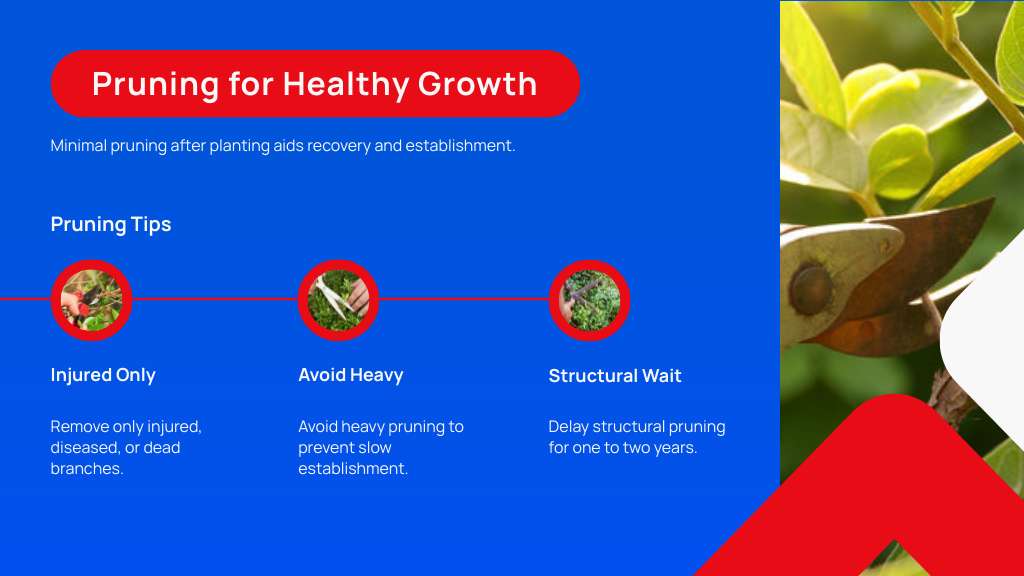
Pruning thoughtfully supports your tree’s long-term health and beauty.
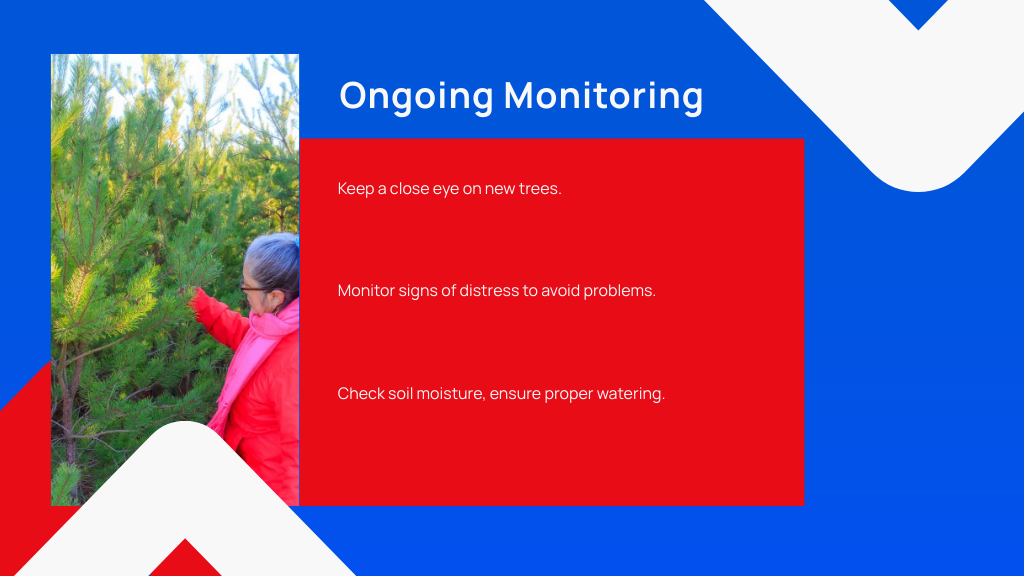
Keeping a close eye on your newly planted tree is essential during its first years. You'll want to monitor for signs of distress like wilting leaves or stunted growth, which can signal problems with water, soil, or pests.
Check soil moisture regularly, ensuring the tree gets 6-8 gallons of water per inch of trunk diameter weekly, especially in the first two years. Inspect for physical damage from animals or equipment, and use protective measures like wire-mesh cages when needed.
Avoid fertilizing until the tree is fully established, usually after the first growing season, to let roots develop properly. Finally, engage with community tree care initiatives to stay informed and contribute to your urban forest’s long-term health.
Now that you’ve nailed these essential steps, you might think planting a tree is the easy part. But here’s the twist—your real challenge begins after the tree’s in the ground. Will you spot the signs it needs extra care? Can you keep up with watering, pruning, and protecting it from pests? Stick with it, and you’ll watch your tree thrive, transforming your space into something truly special. Ready to see what happens next?


I'm a blogger dedicated to sharing insights on lifestyle and wellness. Through personal stories and practical tips, I aim to inspire and empower my readers to lead healthier, more fulfilling lives.
Your email address will not be published. Required fields are marked *